Sunday, August 17, 2008

Write up


Title: Dark City
Area of choice: Weather changes

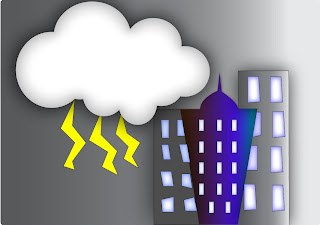
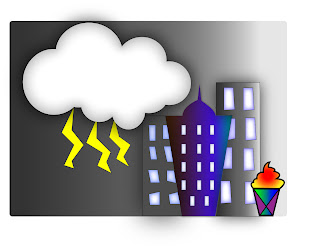
The area of choice for these assignments is 'Weather Change'. Weather change is one of the effects of global warming. Firstly, The theme or the effect I wanted for this illustration is a gloomy effect. I tried to create a dark and negative effect. Basically, The title of this illustration tells the story behind this illustration. Well, Maybe a little. As you can see, for the background, I used Grey to create a cloudy day effect. As a huge dark cloud comes upon the city, The city becomes dark and the sun is no where to be seen. But yet, As the cloud comes upon the city, As the buildings are shadowed by the cloud. A building stands out. A building is not overshadowed by the cloud. It is a sign of hope. A sign where even when dark clouds appear, Hope is not lost. I feel that this can be applied even in our personal life. What more in this issue of global warming? As global warming worsens, As the weather are unpredictably changing by the minute, HOPE IS NOT LOST!

Also to create a 'instability' effect, You can see the shape of the blue building and all the windows. You can see the unevenness of it. I would like to use them as representations of the instability in the weather. It is to represent the changes and the effects of weather changes on a city or the world in fact.

The background I used a gradient effect, From a Grey colour to a slightly brighter white effect. Even though the dark clouds dawns upon the city, At the end of the day, There is hope. We can see the sun shining brightly. Therefore, Global warming is still at a stage where we can do our part to stop it from becoming worst.

Tools used:
~Swatches: I used different kinds of "swatches" so that it was easier to define a certain object.
~Pen tool
~Gradient tool
~Stylize effect-inner glow and outer glow(cloud,buildings, and windows)
-Pathfinder-to create cloud and building
- to align windows
~Shapes tool(eclipse and rectangle)

Colours used:
Grey- to create a gloomy and dark effect.
Black- to create a dark effect
Blue- to show warmness and hope
Yellow- to show energy
The progress of assignment 2 = )

Assignment 2!

The Progress.

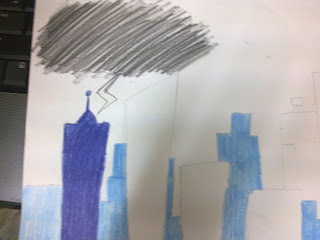
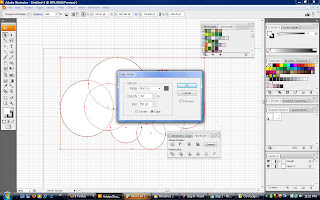
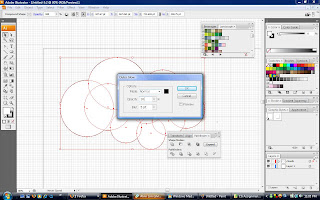
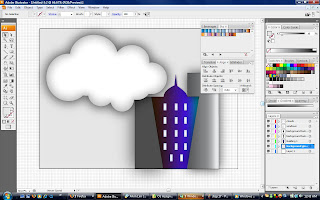
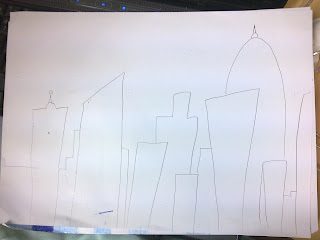
Step 1: I did some sketches. A rough idea of how I wanted my illustration to look like. Step 2: I started of by adding the grid, ruler and some personalize swatches. Step 3: I created another layer for the clouds. I first used the shape tool by using the eclipse shape to create a cloud-like shape. Step 3: I "select all" the circles and used the pathfinder. I click on the far left icon.


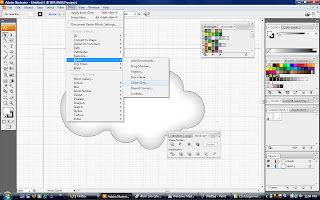
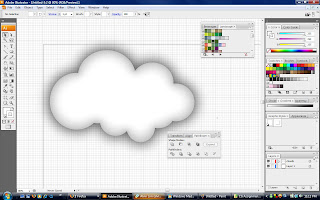
Step 4: Thus, I will have a cloud shape.
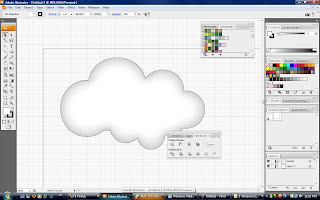
Step 5: I then "select all" the cloud and use the stylize tool. Using the "inner glow" and outer glow, The cloud looked more realistic


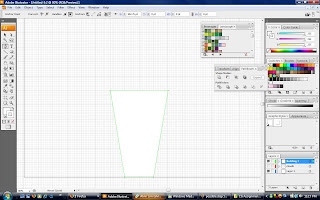
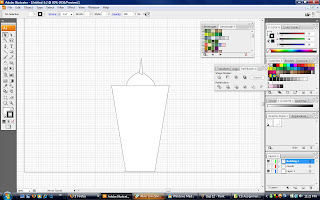
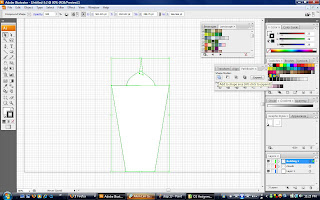
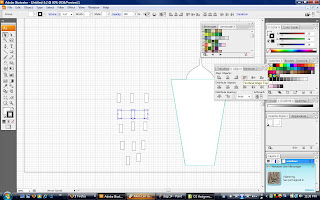
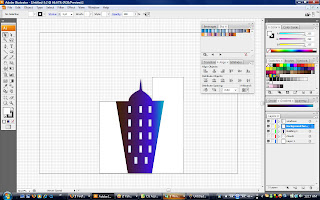
Step 6: I used the pen tool to create the first building.Step 6: I also used the pen tool to create windows for the building. All these I separated them into a few layers Step 7: I then added colour into the building. I use the gradient effect for the building. All the colours were taken from personalize swatches

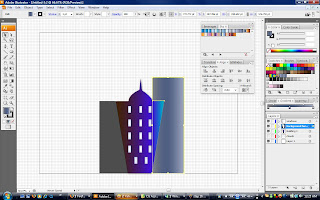
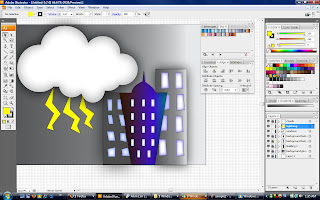
Step 8: Then, I created two background buildings using the pen tool.
Step 8: I also used the stylize tool where I added inner glow and outer glow to the buildings as well as the windows. I used some 'landscape' liked colours from the swatches. Step 9: this was the outcome.

Step 10: I wasn't satisfied with the outcome. So i added some stuff. I added lightning rods using the pen tool and coloured it yellow. I added some windows which i created using the pen tool. I used the stylize tool as well and added some inner glow and outer glow. I created a background. I used the shape tool to create a rectangle for the back and used the gradient tool.

This is my final product. I know it's a little too simple.

Last step:
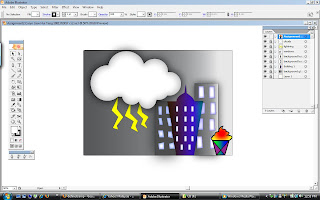
I forgot to add my logo from my assignment 1. = P
So I created another layer for the logo. Each item in the illustration has its own layer.

Final final final Image = )

weather change


Why do weather changes?
http://wiki.answers.com/Q/Why_does_weather_change


The weather changes, as well as the seasons, because of the earth's rotation on its tilted axis, as the sun only heats parts of the earth part of the time, like a rotisserie chicken on the barbie.

Answer

Weather changes because differential temperatures cause density changes in air and water, and the resulting pressure gradients stimulate the movement of those fluids. Coriolis forces contribute to the effects. The sun is the prime mover in all this. Sunlight heats the surface of the earth, and does so selectively because areas farther north or south do not receive the same amount of solar energy. Atmospheric effects influence the weather. Clouds reflect sunlight. Fires, volcanic action and human activity fill the air with a variety of gases and particulates that absorb or reflect more sunlight, each according to its own properties. All of this, the weather, is a dynamic process. It is in flux; it is changing. And the complexity of weather presents us with challenges in managing everything from the growth of food crops right down to planning the logistics of our daily lives.

Assignment 2

Assignment 2 – An Illustration of the Area (15%)

The purpose of this assignment is to illustrate the area of your choice. Based on the area you have selected, you are to create an illustration of the area.

For example:

If the area you chose was deforestation, you are to illustrate / draw a tree or trees in Illustrator.

If the area you chose was melting of the ice caps, you are to illustrate / draw the ice cap or ice berg in Illustrator

If the area you chose was to save the polar bear, you are to illustrate /draw a polar bear or polar bears in Illustrator.

The purpose of doing so is to follow the area of choice that you previously did in your symbol. In other words, please follow the area you did in your symbol. The image / illustration that you create can be used as part of the poster that you will create in Assignment 3.

Requirements

(1) Based on the research of the area of choice, ideation must first be drawn. In other words, you are to draw your idea on paper first prior doing it in Illustrator. The process of ideation to final output must be documented on a blog or web log that all students must create.

(2) Using the symbol that you design in assignment one, the illustration is based on the area of your choice. Therefore, the symbol MUST be placed within the illustration to “symbolize” the awareness of global warming. You can place them at one corner of the image (Bottom right-hand corner of the image.)

(3) Size of the illustration – A3

(4) Printout the illustration and mount it on an A3 mounting board.

(5) The other side of the mounting board must contain a write-up page. The write-up page must contain - the title of the illustration and the area of global warming of your choice.

(6) Include your name, ID and group at the back of the mounting board.

Documentation to be done on the BLOG (5%)

(1) Include the RESEARCH you have done on the area of choice (add the web links).
(2) Include the idea of the illustration. You must include the references you used in the blog.
(3) Include designs, sketches, references or images that you use to create your symbols, tools that you used and the final output.
(4) Tools used. You are to EXPLAIN the tools that you used and learnt from the tutorials and EXPLORED.

Submission:

(1) Students must submit the Illustrator file and title it studID_Illustration.ai. Date of Submission: Week 9 in tutorials to tutorial Group Leader.
(2) The student name, ID and Group must also appear inside the document. Marks will be deducted if you do not enter your name, group and ID properly. Marks will also be deducted if there are no name, ID and group.
(3) All class submission guidelines must be followed. Not following these requirements will mean a reduction in your marks in this exercise.
(4) Any copying or similar illustration may result in the students getting an automatic "0" mark. NO PLAGERISM

Criteria for marking:

(1) The concept itself and the proof of concept which are the sketches, references and research.
(2) Use of the tools - the proper and creative use of the tools

(3) Design of the illustration and the story it tells.
(4) Write-up and documentation must be in proper English.
(5)
Detail description of the process.
(6) Quality of the printing and display.


References

http://www.garyswift.com/htmlimages/buildings.gif
http://www.jeffsweather.com/
http://www.jeffsweather.com/archives/Reuters%20North%20View-%20Convective%20Rotation.jpg